Using Pre-Mixed Adhesives for Natural Stone Wall Cladding
Table Of Contents
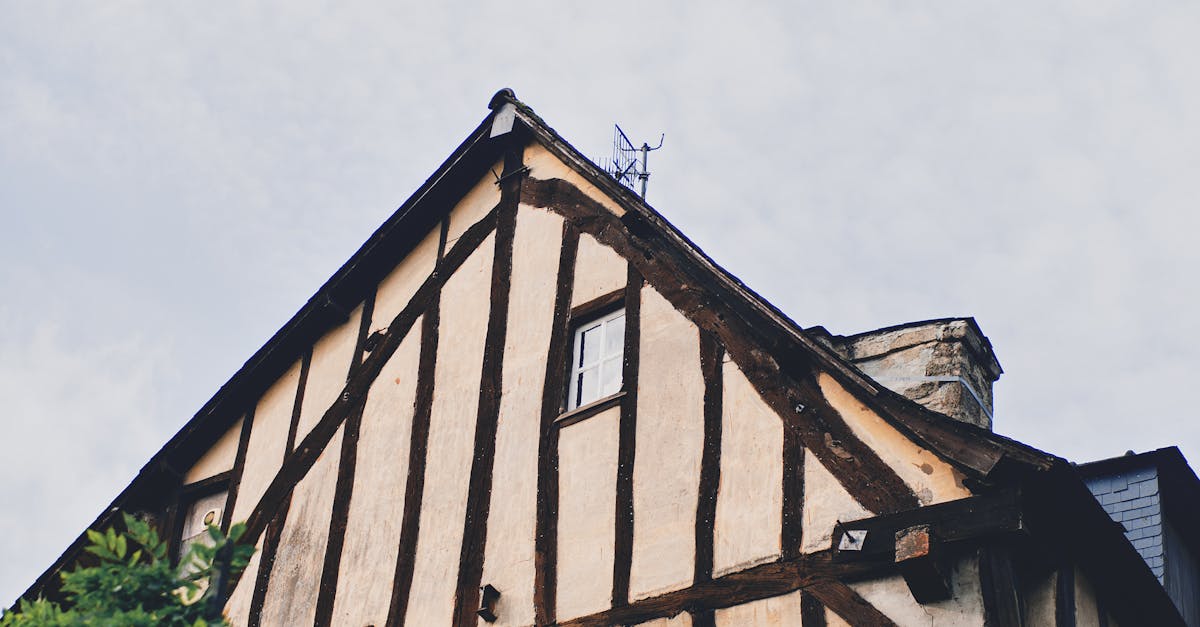
Applying Adhesives for Wall Cladding
When applying pre-mixed adhesives for natural stone wall cladding, preparation is crucial. The surface must be clean and free of dust or debris, ensuring the adhesive bonds effectively. It is advisable to read the manufacturer's specifications for optimal results. Depending on the stone's weight and size, the adhesive application technique may vary. Using a notched trowel helps achieve an even layer, allowing for better adhesion and a more polished finish.
Careful attention should be paid to the layout of the stone pieces as they are being applied. Starting from a corner or the lowest point helps maintain a level installation. As the stones are placed, pressing them firmly into the adhesive is important for a secure bond. Frequent checks for alignment and gaps help avoid complications later in the process. Proper application techniques significantly impact the overall durability of the cladding.
Techniques for Effective Application
When applying pre-mixed adhesives for natural stone wall cladding, using the right technique is crucial for achieving a strong bond. Begin by preparing both the substrate and the stone surface to ensure they are clean and free from contaminants. Use a notched trowel to spread the adhesive, opting for a notch size that aligns with the weight and thickness of the stone. This helps create an even application, allowing for better adhesion. Place the stone onto the adhesive bed gently, pressing it firmly but carefully to avoid air pockets.
It is essential to check alignment as you work, especially with larger stones. Adjustments should be made quickly while the adhesive is still workable. Regularly evaluate the coverage on the back of each stone; it should be adequately coated to ensure a solid grip. For heavier pieces, consider back buttering—applying a thin layer of adhesive directly to the stone's surface before placing it onto the wall. This technique enhances contact area and improves the overall bond strength.
Curing and Setting Time
Understanding the curing and setting time of pre-mixed adhesives is essential for achieving a durable bond in natural stone wall cladding. The time required for curing can vary based on factors such as temperature, humidity, and the specific adhesive product being used. Typically, full setting could span from 24 hours to several days. This period allows the adhesive to reach its optimal strength, ensuring that the cladding adheres effectively to the substrate.
Inadequate curing can lead to weak bonds, which might result in shifted or loose stone tiles over time. It is advisable to avoid heavy traffic or additional construction work around the newly installed cladding during the curing phase. Proper ventilation might also assist in maintaining consistent temperatures, which can positively affect the setting time. Following manufacturer guidelines regarding curing times will help ensure the longevity of the installation.
Understanding the Importance of Proper Curing
Curing plays a crucial role in the longevity and strength of natural stone cladding applications. When adhesives are correctly cured, they achieve optimal bonding strength, which is essential for the stability of the cladding. An inadequate curing process can lead to weak adhesion, resulting in future issues such as cracking, dislodgement, or water ingress. Additionally, proper curing conditions, including temperature and humidity control, significantly influence the effectiveness of the adhesive used.
The time required for adhesives to cure varies based on the specific type of adhesive and environmental conditions. During the curing period, the structure should remain undisturbed and shielded from environmental elements that could interfere with the adhesive’s performance. Monitoring these conditions ensures that the cladding remains securely in place over time. Understanding the significance of this process fosters better installation practices and ultimately contributes to a more durable and aesthetically pleasing finish.
Maintenance of Natural Stone Cladding
Regular maintenance is essential for preserving the beauty and integrity of natural stone cladding. Periodic cleaning with a gentle detergent and water helps remove dirt and stains. Avoiding harsh chemicals is crucial, as they can damage the stone's surface. A soft brush or cloth will prevent scratching while ensuring that any grime is effectively lifted away. Keeping the surfaces clear of debris and organic matter can also prevent discoloration and mildew growth.
Sealing is another important aspect of maintaining natural stone cladding, as it protects against moisture absorption and staining. Choosing a high-quality penetrating sealer enhances the stone's resistance to weathering. Application should be performed according to the manufacturer's recommendations to achieve optimal results. Regular inspections for signs of wear or damage allow for prompt repairs, thereby extending the life of the cladding. Appreciating the unique characteristics of natural stone fosters a proactive approach to its upkeep.
Tips for Longevity and Care
Regular cleaning is essential to maintain the beauty and integrity of natural stone cladding. Use a soft brush or cloth to remove dirt and dust, avoiding harsh chemicals that can etch or damage the surface. When deeper stains occur, a mild detergent mixed with warm water can be effective. Always rinse thoroughly to prevent residue build-up, which can dull the stone’s appearance.
Inspecting the cladding periodically for signs of wear or damage will help catch issues early. Look for cracks or chips that may compromise the structure. It is advisable to reseal the stone every couple of years, depending on the type of stone and the environmental conditions it faces. This will enhance its resistance to moisture and stains, ensuring the cladding remains in optimal condition.
FAQS
What are pre-mixed adhesives for natural stone wall cladding?
Pre-mixed adhesives are ready-to-use bonding agents specifically formulated for adhering natural stone to various surfaces, eliminating the need for mixing powders and liquids.
How do I apply pre-mixed adhesive for wall cladding?
To apply pre-mixed adhesive for wall cladding, use a notched trowel to spread the adhesive evenly on the back of the stone or the wall surface, ensuring full coverage for optimal bonding.
What is the typical curing and setting time for pre-mixed adhesives?
The curing and setting time for pre-mixed adhesives can vary by product but generally ranges from 24 to 72 hours, so it’s essential to check the manufacturer's instructions for specific guidance.
Why is proper curing important for natural stone cladding?
Proper curing is crucial as it ensures that the adhesive fully bonds with the stone and substrate, preventing issues such as slipping, cracking, or moisture infiltration in the future.
What maintenance tips should I follow for my natural stone cladding?
To maintain your natural stone cladding, regularly clean it with a pH-neutral cleaner, avoid harsh chemicals, seal the stone periodically, and inspect for any damage or wear that may require attention.
Related Links
Troubleshooting Adhesive Issues in Natural Stone InstallationsTemperature and Humidity Considerations for Adhesive Application
The Importance of Drying Time in Adhesive Application
Tips for Achieving Strong Bonding with Natural Stone Adhesives
Best Practices for Mixing and Applying Adhesive
Understanding Thinset vs. Mastic for Natural Stone Adhesives
Common Mistakes in Adhesive Application for Natural Stone
Step-by-Step Guide to Applying Adhesive for Natural Stone